Monday, 28 October 2013

JELLY SLICE

This Jelly Slice recipe is free from Gluten, Dairy, Eggs and All nuts.


INGREDIENTS 

1 Packet Strawberry Jelly Crystals. 
500mls Rice Milk
1/4 CUP Corn Flour
2 TSP Vanilla Essence 
1/2 CUP Sugar
3 TSP Gelatine
1 CUP Tapioca Flour
1/2 CUP Rice Flour
1/2 TSP Xanthan Gum
150g Nuttelx (Dairy Free Spread) 
1/2 CUP Icing Sugar


BASE
Line your slice tin with Baking paper and pre heat the Oven to 180 degrees.

In a Saucepan melt the Nuttlex, once melted add 1 CUP Tapioca Flour, 1/2 CUP Rice Flour, 1/2 TSP Xanthan Gum and 1/2 CUP Icing Sugar. Stir until combined.
Press the mixture into the base of the Slice Tin and bake for 20min.
Set to cool completely.

MIDDLE
Poor Rice Milk, Vanilla Essence, Sugar and Corn Flour into a Saucepan, place on a Mod to high heat stirring constantly until mixture begins to thicken. Cook for approximately 9min.
Allow mixture to cool slightly before adding Gelatine. 

Poor the mixture on top of the base and set to cool completely in the fridge. 

Once set, make the Jelly per the box instructions and allow it to cool (but not starting to set) before pouring over the Rice Milk Custard filling. 

When the Jelly has set, remove from tin and slice. 


Sunday, 18 August 2013

BEAN BROWNIES


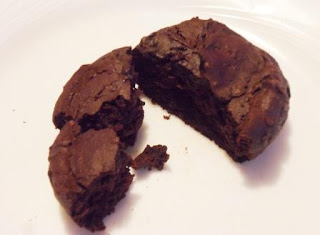
The kids and I had a bit of a bake up this afternoon and made these Bean Brownies.

They are seriously delicious so don't let the idea of beans put you off!  Using beans instead of flour makes these Gluten Free and I used dairy free spread instead of butter to make them Dairy Free too.

Ingredients:
1 Tin (1 1/2 cups) Beans well rinsed - I used Cannellini beans today but we also use Kidney beans or Black beans depending on what is in the cupboard.
2 Eggs
3 Tablespoons Dairy Free Spread
¾ Cups Cocoa Powder  I buy THIS Edlyn Cocoa as it has no allergens listed and my son has not had any reaction, I buy it from a local bulk foods store as our supermarket don't stock it.
Pinch of Salt
1 Teaspoon Vanilla Extract
2/3 Cup Sugar
1-½ Teaspoons Baking Powder


Preheat oven to 180 degrees.

Grease a 12 hole muffin tray or a brownie pan.

Puree all ingredients in a blender or food processor for about 3 minutes, pausing once to scrape down the sides, the mixture should now be a thick batter.

Spoon the mixture into the prepared pan and bake for 12-15 minutes.

Remove from the oven and let cool a little before removing from the pan.


Have you tried baking with beans before?  Did you love it as much as I do?

Shared By Emily

Saturday, 17 August 2013

Fruit Filled Bars - Dairy and Soy Free


My kids love these Fruit Filled Bars that are Dairy and Soy free. They are perfect for lunch boxes or an on the go snack.

Here is what you need:

Dough:

125g Dairy Free Spread
1/4 Cup Sugar
1 Egg (or egg replacer can be used)
2 Cups Plain Flour
2 Teaspoons Baking Powder
 
Filling:
1 Tablespoon Corn Flour (Starch)
2 Cups Tinned or stewed Pears, pureed or chopped finely. Or feel free to get creative with Apples, dates, berries etc.  We choose pears as they are low salicylates.

Dough:
In a large bowl cream spread and sugar together.
Mix in the egg. Add flour and baking powder and mix to form soft dough. Set aside.

Filling:
Mix the Corn Flour through the Pear puree. (I find it helps to mix it in with a couple of teaspoons of cold water before putting it in so it does not clump and evenly thickens the puree).


Pre-heat the oven to 180 degrees.

Using two sheets of cling wrap roll half the dough out in between (like in the following picture).  This helps stop the dough from sticking to the bench and your rolling pin as well as helping with the rolling.
 

Remove the top layer of cling wrap and spoon a trail of approximately half the pear mixture along the centre of the dough.  Use the cling wrap to help fold one side over the pear mixture, then again from the other side over the first layer.  Think "sausage roll".
 

Repeat this with the other half of the dough and pear.

Carefully transfer the rolls to a baking tray and cut into the desired size – I have done small squares as these are for my young boys and a large bar would be too much for them in one go.

Bake for 20 minutes or until golden.

This recipe should make 12 small bars or 6 large bars
Shared By Emily

Friday, 19 July 2013

COCONUT CAKE


Dairy, Soy, Nut and Egg Free!

This recipe is one I bring out when I need a delicious side for coffee with friends!

It is also a great recipe to make with kids and mine love choosing the dried fruits to go in it! 

I have used Currants, Saltanas and Dried Apricots - Today though I used chopped Dates!

Ingredients

1 Cup Self Raising Flour
1 Cup Desiccated Coconut
1 Cup White Sugar
220ml Rice Milk (I generally just do a not quite 1 cup measure though!)

1 Cup Dried Fruit of Choice

Pre-heat your oven to 180 degrees and line a loaf tin with baking paper (mine new loaf tin is a wider than normal tin great for baking real sized bread - but it did make for a very thin cake! But it worked).

In a large bowl combine all the ingredients.

Pour into the lined loaf tin and bake for 40 minutes or until golden and a skewer inserted into the centre comes out clean. 

Serve warm or cold!

SharedByEmily


CRISPY CRUNCHY MEAT BALLS


Dairy, Soy and Nut Free!

This recipe came from one of those days when I had none of the usual morning tea fixings in my fridge or pantry yet my kids were hungry and I was not going shopping before they had had a good snack!


What I did have I used to create these tasty treats!

Ingredients

1 Packet Sausage Roll Mince  (I am thinking of trying a chicken mince version too for a more KFC style)
1/2 Cup Home Made Breadcrumbs or Rice crumbs
1 Egg
1/2 Teaspoon Crushed Garlic
Salt and Pepper to Taste

Crushed Weetbix for coating - I use the end of the box crushed pieces that are always left but no one wants - couldn't help but feel proud of finding a use for them!

Pre-heat your oven to 180 degrees.

Combine the mince, breadcrumbs, egg and seasonings in a large bowl.  Roll into small balls and roll in crushed Weetbix.
Place on a baking tray 1-2cms apart.
Bake for 20 minutes or until cooked through.

SharedByEmily

PIKELETS


This is my pikelet recipe - basic, quick and makes the perfect pikelets!

Dairy, Soy and Nut Free!

Ingredients:

1 Cup Self Raising Flour
2 Tablespoons Sugar
1 Egg (or Egg Replacer)
3/4 Cup Rice Milk

In a large bowl combine the flour and sugar. Add the egg and milk and using a whisk gently mix into a thick and smooth batter.

Preheat a frypan to a low-medium heat and lightly grease.  Drop tablespoon sized amounts of mixture into the pan and allow to cook until bubbles start to appear, then flip using a flat spatula.

Cook the other side until golden as well.

Serve warm with your choice of spread, syrup or even just a little lemon juice!

SharedByEmily

Sunday, 14 July 2013

PEANUT SATAY - free from dairy, gluten and soy


For a complete allergy friendly recipe see THIS Chicken Satay recipe - the recipe below does contain peanuts and coconut.

HOWEVER if you are completely blessed like my family and everyone can eat these foods this is a delicious recipe that is free from dairy, gluten and soy!

Ingredients

1 or 2 Chicken Breasts (some can be huge and some tiny - I aim for around 400gms)
1 Cup Coconut Milk
1/2 Cup Crunchy Peanut Butter (read the label to be sure its soy free though - I have made that mistake before!)
1 to 2 Tablespoons Sweet Chilli Sauce
Salt and Pepper to taste

Rice and Veggies to serve - I like to keep this as my quick and easy dinner night so I just use some frozen veggies but feel free to get creative and use whatever you have on hand and your family enjoys!

Dice the chicken and cook in a large fry pan.
Add your other ingredients and stir through until the sauce starts to thicken.

Its just that easy (makes you wonder why they sell it in a jar???).

SharedByEmily

CHOCOLATE SPREAD / DIP - ALLERGY FRIENDLY


This chocolate spread or dip is so easy to make and so versatile - I love it on fresh bread, toast or anything that I can spread it onto.

It also makes a fantastic dip for fruit - which totally spices up a fruit platter at a kids party!

I love that it also comes with all the goodness of avocado too (which by the way is completely hidden by the chocolate awesomeness!).

I use;

1 Very Ripe Avocado
1/4 Cup Cocoa
1/4 Cup Pure Icing (Powdered) Sugar
1 Teaspoon Vanilla Essence

Use a stick blender in a narrow container to blend the spread nice and smooth.  

Enjoy (and try not be like me and leave annoying little pieces of breadcrumbs in the jar - that's the worst!!).

SharedByEmily

Monday, 8 July 2013

DUMP TRUCK BIRTHDAY CAKE - FOOD ALLERGY VERSION

A Fun Dump Truck Birthday Cake!

Using the Chocolate Cake Ball Recipe posted here on Kitchen Mission makes perfect boulders to fill the Back of a Dump truck! I added Cocoa Powder and texture to some of the Cake Balls to give the Boulders a little Character! 


CHOCOLATE CAKE BALLS (No mould needed) FOOD ALLERGY VERSION

INGREDIENTS
One baked Chocolate Cake (THIS recipe works well)

    2 1/2 CUPS Icing Sugar
    6 TBS Dairy Free Spead (Nuttelex)
    2 TBS Warm Water
    3 TBS Cocoa Powder
    300grams Dairy Free Chocolate
    2 TBS Oil

Mix using an Electric beater Dairy Free Spread, Warm Water, Icing Sugar and Cocoa Powder until you have Fluffy Pale Frosting. Set Aside.  

Crumble the pre baked Cake with your  fingers into a bowl.


Then mix just enough frosting through that will allow the cake to hold together when moulded into balls.


Roll the cake mixture in balls, you can roll them as big or as small as you like.


Once you have rolled all your cake balls freeze for a couple of hours or over night.


From here all you need to do is melt your Chocolate and add the Oil to the melted Chocolate, the oil will thin the chocolate, making it easy to dip and coat the balls of Cake.

Place Chocolate dipped balls onto baking paper while setting.


Enjoy!


SharedByCaroline

Saturday, 6 July 2013

LASAGNE - FOOD ALLERGY SAFE

This recipe is FREE from WHEAT / GLUTEN, DAIRY, EGGS, ALL NUTS and SOY...


INGREDIENTS
     Gluten Free Pasta
     1 Kg Beef Mince
     1 Cup Bacon Diced
     1 Can Condensed Tomato Soup (Make sure to check your labels)
     1 TBS Crushed Garlic
     3 TBS Olive Oil
     1 TSP Chicken Stock Powder
     3 TBS Dairy Free Spread/Margarine (Nuttlex)
     3 TBS Corn Flour
     3 CUPS Rice Milk

You will need to make a WHITE SAUCE ROUX (RECIPE HERE) using the Nuttelex, Rice Milk and Corn Flour...
When your White Sauce is ready add 1 TBS Olive Oil and 1 TSP Chicken Stock Powder - Mix well.

Fry Bacon, 2 TBS Olive Oil and Garlic briefly before adding the Beef Mince.
Brown the Mince before adding the Condensed Tomato Soup.
Simmer for 5 - 10min.

Using a Casserole dish, spread a thin layer of the mince mixture/sauce over the bottom before laying your first layer of Lasagna sheets.
Then on top of the sheets a layer of Beef Mince,
                                                         Layer of Pasta Sheets,
                                                         Layer of White Sauce,
                                                         Layer of Paster sheets,
                                                         Layer of Beef Mince
                                                         Layer of Pasta Sheets
                                                         Layer of a little Beef Mince and Pasta Sauce.

Bake uncovered in a pre heated  180 Celsius oven until the pasta sheets are soft, aprox 40min.


Slice and serve Hot.


SharedByCaroline 

Thursday, 4 July 2013

DAIRY FREE SCONES


The humble Aussie Scone - living without Dairy means you probably wont be able to pick one up at the local Show's Devonshire Tea but you can make them at home!

This recipe was tested (and approved) by the In-Laws so, I think it is fair to say they are delicious... Even if they are lacking the token dollop of Cream.


INGREDIENTS

Plain flour, for dusting
3 Cups Self-Raising Flour
80g Dairy Free Spread (Nuttelex)
1 to 1 1/4 Cups Rice Milk

Jam or Dairy Free Lemon Butter to serve
 

Preheat oven to 200°C. Lightly dust a flat baking tray with plain flour.

Sift self-raising flour into a large bowl.

Using your fingertips, rub the butter into the flour until the mixture resembles fine breadcrumbs.

Make a well in the centre. Add 1 cup of Rice Milk. Mix with a flat-bladed knife until the mixture forms a soft dough, adding more Milk if required.

Turn onto a lightly floured surface. Knead gently until just smooth – the trick to light and fluffy scones is not over mixing so as soon as it’s pretty nearly ready, stop! Even if all your instincts are saying "more, more".

Flatten dough until approx 2cm thick. Using a 5cm (diameter) round cutter, cut out 12 rounds. Press dough together and cut out remaining 4 rounds. 
Place scones onto prepared baking tray, 1cm apart for raising room.

Bake for 20 minutes or until golden.

Serve warm with Jam.


SharedByEmily

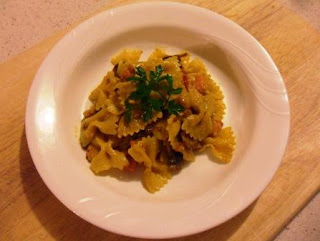
DAIRY FREE CARBONARA


Here is a rich and Creamy Carbonara recipe that isn't made with Creams, Dairy Milks or Cheese.  Super delicious and surprisingly quick to make!

This recipe is also easily adapted to gluten free by using a gluten free pasta.

If you cant have Eggs check out THIS recipe here. 

INGREDIENTS
5-6 Rashers of Bacon chopped
7-8 Button Mushrooms sliced
Optional: Chicken, baby Spinach

2-3 Cups uncooked Pasta (in whatever shape you like, we use bows or shells as its easier than fettuccine for the kids but its up to you!)

5 Egg yolks (keep the Egg Whites for other baking since they are not needed here.)
100mls Rice Milk
1 Teaspoon of powdered Chicken Stock
Pepper to taste (we don't normally add Salt since the Pork and stock are quite salty already.)


Set your Pasta to cook as per the packet instructions.

While the Pasta is cooking grab a deep fry pan and cook the Bacon and Mushrooms in a little oil.  Turn off the heat once done but you will be using this pan later.

In a jug mix up your Egg yolks, Rice Milk and Chicken Stock until the Yolks are all broken up and well combined with the Stock and Milk.

Drain the water from your Pasta and add this to your deep fry pan containing the Bacon and Mushrooms.  Turn the heat back on very low.  Pour in your Egg Yolk mix and stir until all the Pasta is covered.

The idea is to only very slightly cook the egg mixture, so keep the heat down low (sometimes if we time it right we can do it with the heat of the pan/freshly cooked pasta).  What you are looking for is the sauce to thicken and change colour slightly.

Serve immediately.


SharedByEmily


Friday, 28 June 2013

TINY TEDDY/TEDDY GRAHAM BISCUITS

Tiny Teddy's are a Australian Childhood biscuit icon, much like the Teddy Grahams available outside of Australia.

Now you can indulge in my own version of these little cookies. Free from Wheat/Gluten. Dairy, Eggs, Soy and Nuts!

Ingredients
     1/2 CUP Dairy Free Spread (Nuttelex)
     1/2 CUP Caster Sugar
     1 TSP Vanilla Essence 
     1/3 CUP Corn Flour
     1/3 CUP Tapioca Flour
     1/3 CUP Rice Flour
     1 TBS Potato Flour
     1/2 CUP Cocoa
     1 TSP Baking Powder
     1 TBS Xanthan Gum
     2 TBS Rice Bran Oil

In a bowl, using a electric mixer cream the Dairy Free  Spread (Nuttelex), Caster Sugar and Vanilla Essence until pale and fluffy. Add Rice Brain oil and stir with spoon. 
In a separate bowl add all the flours, cocoa, Baking powder, Xanthan Gum and gently mix with a whisk until well combined.

Add your Cocoa Flour blend to the first bowl and mix with a spoon, it will look dry and crumbly, you will have to get your hands in the mix to bring it all together.

Between two sheets of Cling Film roll the dough out flat and slice into small rectangles (about the size of a Tiny Teddy) with a sharp knife...*Note Feel free to use a little cookie cutter if you have one.


Place the little rectangle cookies on a lined baking tray and bake in a pre heated oven at 180 Celsius for 12 minuets. 

Cool completely on a wire rack.


SharedByCaroline


Tuesday, 25 June 2013

CHOCOLATE BISCUITS - DAIRY AND EGG FREE

Just whipped up a batch of these delicious biscuits for tomorrow!
Super fast, easy and delicious!

Ingredients:
1/2 Cup dairy free spread (Nuttelex)
1/2 Cup caster sugar
1/2 Cup cocoa powder
1 Cup plain flour
2 Teaspoons baking powder


Pre heat oven to 170degrees.
Cream the dairy free spread and sugar until pale and fluffy. 
Sift in the cocoa, flour and baking powder and with a spoon, mix into a dough.
Work with your hands until it is a good consistency for rolling and roll out with a rolling pin.
Using a cookie cutter cut into approx 20 biscuits. Place on a lined tray.
Bake for 12-15 minutes.  Cool on a wire rack.
Enjoy!


SharedByEmily

Saturday, 22 June 2013

BLACK FOREST FUDGE


I Love Black Forest Cake! We have taken the experience one step further with Black Forest Fudge!

INGREDIENTS
1 tin sweetened condensed milk 
75g butter
400g dark chocolate melts
1 tin black cherries, drained
Small packet of White Chocolate Drops (Reserve some to chop for the top if you want)

Optional - Fresh Cherries to serve.

Prepare your container for the fudge, I'm using a slice tin covered with cling wrap - this allows for easy removal!

Melt the Butter in a medium size saucepan on low heat. 
Add the Chocolate and and Condensed Milk, string often until the chocolate is melted too.

Turn off the heat and add in the Cherries and White Chocolate drops.

Pour the fudge into the tin/container you are planning to let it set in and sprinkle with chopped White Chocolate.
Place it in the freezer for a couple of hours to set.  Transfer to the fridge for storage.


Slice the fudge and serve!


SharedByEmily

Friday, 21 June 2013

CHICKEN KIEV BALLS - FOOD ALLERGY SAFE

The recipe is free from GLUTEN / WHEAT, DAIRY,  EGGS, NUTS and SOY.


INGREDIENTS
     500g Chicken Mince
     2 TSP Crushed Garlic
     Salt and Pepper to tastes
     Rice Crumbs (Or gluten free bread crumbs)
     Corn Flour
     Rice Milk
     1/2 CUP + 2 TBS Dairy Free Spread (Nuttelex) Melted


In a mixing bowl using you hands combine Mince, Salt, Pepper, Garlic and 2 TBS of the melted Nuttelex.

Now you will need to roll Small balls with the chicken mix - you might find it helps to regularly wet your hands with water.

Each ball is then individually rolled in Cornflour then Rice Milk and finally the bread crumbs, coating completely.

Cook the Kiev Balls in the remaining 1/4 CUP Melted Nuttelex using a casserole dish for 30min at 190 Celsius. Be sure to roll the balls with a spoon so they coat completely with Melted dairy free spread.


Thursday, 20 June 2013

LEMON CURD - DAIRY AND EGG FREE


Lemon Curd, delicious as it is versatile; think lemon pies, tarts, cakes, with yoghurt  on toast or how we had it today on pikelets!

I love how easily this recipe is! Best part is it is Dairy and Egg free!

Juice of 1-2 lemons
1/2 Cup Castor sugar
80g Dairy free spread like Nuttelex
2 Eggs or egg replacer

In a small saucepan heat all the ingredients together on low heat until they melt and  continue to stir until it thickens.  Use a whisk to stir, it helps prevent lumps and burning.

To test if its ready, take a spoon and dip the back in,  If the curd "coats" the back thickly then its ready.

Pour into a stirile jar and chill in the fridge.

How do you use lemon curd?

SharedByEmily

CHEATS CHOCOLATE / TODDLER CHOCOLATE


SANITY SAVOUR! Counting Calories? Food Allergy restrictions? Chocolate ban? Simple 
solution!

Chocolate that is Allergy safe and takes about 2 minuets to make.
I like to make for my Boys, they believe it's ACTUALLY Chocolate...WIN!


INGREDIENTS
     Pitted dates
     Cocoa Powder


Chop a small handful of dates into bite size bits.

Pop the Dates in a Ziplock bag and about 1/2 a teaspoon of Cocoa powder, shake/mix the dates in the bag so they are well coated in Cocoa.

That's it!


Shared  By Caroline 

Wednesday, 19 June 2013

CHOCOLATE AND BASIL FUDGE


Yes you read that right - Chocolate and Basil Fudge!  When my husband first told me about it I automatically thought YUCK!
 
So he went to the shop to buy what he needed (these ingredients rarely invade a home that has a dairy free child), and made this fudge for a night time Mum and Dad only treat!
 
The only downside to the treat is I had it with a side of humble pie - basil and chocolate are not gross.  They are GLORIOUS!!
 
Here is how the hubby did it:
 
1 tin sweetened condensed milk
75g butter
400g dark chocolate melts
1 handful of fresh basil leaves, torn or chopped up a bit
 
Prepare your form for the fudge, we just used a silicone muffin form since we had it and it makes it easy to remove.  Dont own silicone bakeware though?  Use a cake tin or slice tray covered in cling wrap - trust me much easier to get the fudge out in a presentable state.
 
Melt the butter in a medium size saucepan on low heat.  Add the chocolate and and condensed milk, stiring often and continuing on low heat until the chocolate is melted too.
 
Turn off the heat and add in the basil leaves.
 
Pour the fudge into the dish you are planning to let it set in and put it in the freezer for a couple of hours to set.
 
When its ready you can remove the fudge from your form and cut up if you desire or simple pile them on a platter.   Either way its best to store in the fridge until you are ready to serve as it tends to melt under warm conditions which leaves you with sticky fudge rather that smooth deliciousness!
 
Too chicken to try chocolate and basil together??? Make the fudge anyway and just dont put the basil in (or maybe only in a bit of it just to try...).
 
If you give it a go I would love to know what you thought so please leave a comment!
 
SharedByEmily

Tuesday, 18 June 2013

BANANA BREAD MUFFINS

We love Banana Bread, especially topped with a little Dairy free spread...
I have started baking the bread as 'Muffins' and we are LOVING these sweet Banana Bread Muffins.


INGREDIENTS
     4 Medium Ripe/Over Ripe Bananas
     1/2 CUP White Sugar
     1/2 CUP Brown Sugar
     1/2 CUP Vegetable Oil
     1 TSP Vanilla Essence
     2 1/2 CUPS Rice Flour
     1 TSP Baking Powder
     Pinch of salt
     1 TSP Cinnamon (Optional)


Using a stick blender/food processor mix purée Bananas, Sugar and Oil until smooth.
Them mix in the remaining ingredients
Scoop between 12 Muffin Cases and bake for 30 minuets in a pre heated oven at 180 degrees.


Cool on wire rack, serve Warm or Cold. 


SharedByCaroline


BANANA MILKSHAKES - FOOD ALLERGY SAFE

Really easy Allergy Safe Milkshakes! Sometimes ideas can be so simple it's easy to over look...


INGREDIENTS
     500mls Rice Milk
     1 Medium ripe Banana
     1 TBS Rice Malt syrup
     

Using a Blender mix all ingredients until light and fluffy  

APPLE SHORTCAKE


INGREDIENTS
2 tablespoons Dairy Free Margarine
3/4 cup White Sugar
2 Eggs (or Egg replacer if you cant have Eggs)
2 cups Self Raising Flour

800g tin of Pie Apples
1 teaspoon Cinnamon

Icing Sugar for dusting

Pre heat your oven to 180 degrees and line a spring form cake tin.

In a large bowl cream the Margarine and Sugar (it will be fairly dry compared with some "creamings" but that's good) before mixing in the two Eggs.

Using a spoon add the flour to form a soft dough - You may need to use your hands.

Divide the dough into two and press one half into your tin covering the whole base.


Mix the Apples up with about a teaspoon of Cinnamon and spoon them evenly over the pastry base in the tin.

The remaining dough will be the top, to do this use two sheets of cling film so the dough doesn't stick, rolling out a circle to place atop of the apples. Careful as it can be fragile!

Bake for 30-40 minutes until golden.  It should have a firm almost "crust" feel - this is a shortcake after all.

Remove from the tin as soon as its cool enough to handle to prevent the cake sweating and going soft and allow it to cool on a rack. 

Dust with icing sugar and serve!


SharedByEmily

HAMBURGER PATTIES - FOOD ALLERGY SAFE


INGREDIENTS
     500g Mince
     1/4 Cup Rice Crumbs
     1/4 Cup Tomato Sauce (We us Fountain Brand)
     1 TSP Garlic
     Salt and Pepper
     1 TBS Olive Oil + Extra for frying


Using your hands, in a bowl mix ALL the ingredient together thoroughly.
I like to use a scone cutter to press the mince into before flattening slightly with my hands to make lovely round patties.


Cook on the BBQ or Frying pan, Medium to High heat for 5 minuets each side.


Monday, 17 June 2013

RISOTTO - FOOD ALLERGY SAFE

I feel that in the past risotto has had a reputation for being a difficult and tedious dish to make - For me though I can make Risotto in under an hour, prep and all. Risotto is even filed in my memory as an "easy dinner"!

The secret for easy risotto is keeping it simple and having a system since Risotto involves a few different steps.

Let me walk you through how I do things...

STEP 1

Initially I decide what "extras" or "flavour" I want in my risotto.  

My ultimate favourite is butternut pumpkin, baby spinach and pine nuts.
Other variations I have used are mushroom and bacon, lamb and sunflower seeds, sweet potato and chicken or even just frozen veggies and whatever is left wilting in the fridge.

I love how versatile risotto is - you can put pretty near anything in it and it will still be delicious!

Tonight I chose pumpkin, spinach and sunflower seeds.


Prepare your veggies/meat first and sit them aside to be added later.

I normally cook things like chicken, pumpkin and sweet potato in a large fry pan with plenty of olive oil and salt and pepper.  It gives much more flavour than boiling or cooking in the risotto (and notice how the pumpkin has more of a "roasted" look rather than squishy boiled?).

Depending on what veggies you choose this step can take from 2 minutes to 20 minutes but if you are a whizz at multi-tasking who says you cant have the pumpkin cooking on the stove while you stir the rice pot next to it??  (well actually me since I like to use the same deep fry pan for both steps but hey!)


STEP 2 - The Rice

This is the real star here - its what makes risotto, risotto after all!  Use this base and get creative with what you add!
You will need:
- 1 1/2 cups aborio rice
- 1 onion
- 2 cloves garlic
- 3 tablespoons olive oil
- 2 tablespoons lard or dairy free margarine
- 1 litre of chicken stock (I use a powdered stock mixed into hot water from the kettle)

Finely dice the onion and garlic and in a deep pan or large pot cook the onion in the oil and lard until the onion is transparent (yes there is a lot of oil and fat in there but trust me its worth it!).

Rinse the aborio rice until the water runs clear and then add to your onion, garlic and oil mix.  Stir and cook on a low heat so the oil coats the rice and some of it is absorbed into the rice.

Add the chicken stock one cup at a time stiring until the liquid is pretty much absorbed then add some more. For a guide to know when to add more chicken stock run your wooden spoon down the center of the rice, if it leaves a path you are right to add more, if it just closes back over right away give it a little longer).  
Continue until the rice is cooked and the liquid is absorbed.

STEP 3 - Putting it all together
Now you are ready to add in those "extras" into your pot.  Stir them through the risotto and flavour with extra salt and pepper if desired.


Serve - And if you can have parmesan cheese add it to the top of your risotto, if not enjoy it with out it! Since being dairy free we started ommitting the cheese and found it to be just as delicious!

Let me know what you would add in - Always love new ideas!

SharedByEmily